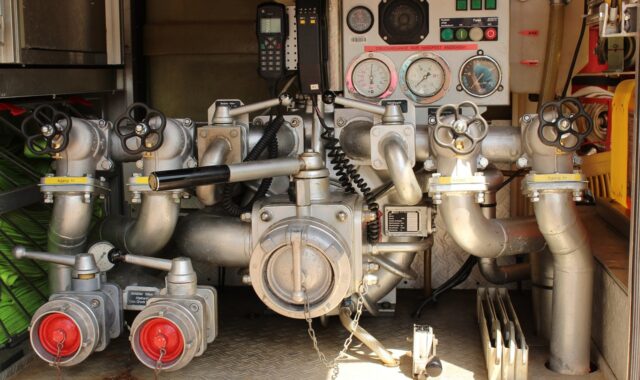
Central heating pump isolation valves leaking causes and repair options
What a leaking pump isolation valve usually means
When water appears around a central heating pump, the isolation valve is not always the only possible source. The leak usually starts at one of four points: the pump union or flange gasket, the valve spindle, the compression joint on the pipe, or the valve body itself. The repair should follow the first wet point, not just the place where water is dripping. A light weep at a union may need a new washer or evenly tightened bolts, while water from the spindle or casting often means the valve should be replaced.
Start any inspection with the heating system switched off, electrically isolated, and cool. Central heating circuits can contain hot water under pressure, and the pump is close to electrical connections. If the valves do not fully isolate the pump, the work is no longer a simple pump-side service task. It may require a controlled drain-down or a qualified heating engineer. You can also explore more in Pumps and Valves.
Isolation valves are fitted so that a circulator pump can be serviced without draining the whole heating system. In practice, they are also common leak points because they sit at a hot, vibrating connection between the pump and pipework. The pump is a moving component, pipework may not be perfectly aligned, and older valve seals harden after years of heat cycling.
For more pump and valve maintenance topics, see the Pumps and Valves category.
Common leak points around a central heating pump
A leak near a circulator can be misleading. Water may run down the pump body, track along a nut, or collect on the lowest fitting before it drips. Before choosing a repair, dry the area, use tissue or a dry cloth to find the first wet point, and check whether the leak appears only while the pump is running or also when the system is cold.
| Observed leak location | Likely cause | Typical repair direction |
|---|---|---|
| Between pump body and valve union or flange | Compressed, displaced, split, or missing gasket or washer | Isolate, remove pump or union, replace correct gasket, refit evenly |
| At flange bolts | Uneven bolt loading, gasket not seated, corrosion around flange face | Retighten evenly if safe; otherwise renew gasket and clean faces |
| Around valve stem or screwdriver slot | Worn spindle packing or internal seal | Gently tighten gland if fitted; otherwise replace valve |
| At pipe compression nut | Loose nut, damaged olive, pipe movement, poor alignment | Slight tightening may help; persistent leaks need refitting |
| From valve casting or seam | Cracked, corroded, or failed valve body | Replace the valve; do not rely on sealants |
Manufacturer literature for hydronic circulators and isolation flanges is consistent on several basic points: service valves are installed on the suction and discharge sides to simplify pump service, gaskets or O-rings must be the correct type, and flange bolts should be tightened evenly. Bell & Gossett/Xylem isolation flange instructions also emphasize relieving pressure and allowing the system temperature to fall before working on the joint. Those principles apply even when the pump brand, flange pattern, or valve style differs.
Why isolation valves start leaking
Heat cycling hardens seals and washers
Central heating valves go through repeated warm-up and cool-down cycles. Rubber washers, fibre washers, and O-rings lose elasticity over time. Once a gasket is flattened or brittle, a small movement of the pump or union nut can create a weep path. This is why a leak may start after a pump replacement, power flush, radiator work, or seasonal restart, even though the valve looked dry before.
Old pump valves may not tolerate movement
Many older pump valves use slotted service screws or compact valve bodies. They may isolate acceptably when left alone but leak after being turned for the first time in years. If the slot is stiff, partly rounded, or seized, forcing it can damage the stem seal or leave the valve half-open. In that situation, replacement is usually more reliable than repeated tightening attempts.
Flange faces and pipework may be misaligned
A pump union is designed to compress a seal between two reasonably square mating faces. If the pipework is pulling the pump sideways, the gasket is loaded unevenly. The leak may return even after a new washer is fitted. Good pump installation practice includes supporting pipework, avoiding strain on the pump casing, and tightening bolts or union nuts evenly rather than using one side to pull the assembly into position.
Corrosion can hide a small long-term leak
Rust staining, green deposits, or white scale around the valve often indicate a slow weep rather than a sudden failure. A joint that has been leaking slowly may have corroded bolts, damaged sealing faces, or a weakened valve body. Cleaning the surface is useful for diagnosis, but corrosion around a pump connection is a sign that a proper seal replacement may be needed.
Safe first checks before attempting a repair
Before touching a central heating pump or isolation valve, switch off the electrical supply to the heating controls and pump at the appropriate isolator. Let the system cool. A heating circuit can contain water hot enough to scald, and even a slightly loosened union can release more water than expected if the isolation valves fail to close.
- Check the system type. A sealed, pressurized system behaves differently from an open-vented system with a feed and expansion tank. Pressure must be relieved in a controlled way before opening joints.
- Confirm both valves actually close. Isolation valves on either side of the pump should stop flow through the pump. If either valve passes water, the pump cannot be removed cleanly.
- Protect electrics. Keep water away from the pump terminal box, junction boxes, programmers, and wiring centers. Water staining near electrical components is a stop-and-call condition.
- Do not overtighten blindly. A small turn may stop a minor compression weep, but excessive force can crack a valve, distort a flange, or damage threads.
- Plan for drainage. Even with working isolation valves, water inside the pump body and short pipe section will drain when a union is opened.
If there is active spraying, a hot leak, a boiler fault, visible electrical wetting, or uncertainty about how to isolate the system, stop work and call a qualified heating engineer or plumber.
Repair options by leak type
Leak at the pump union or flange gasket
This is one of the most common causes of central heating pump isolation valves leaking after pump service. The usual repair is to isolate both sides, drain the trapped water, separate the joint, remove the old washer or gasket, clean the sealing faces, and install the correct replacement. Reusing an old compressed washer is a common reason for repeat leaks.
For flange-style circulators, bolts should be tightened gradually and evenly so the gasket is compressed squarely. For union-style pump valves, the union nut should draw the joint together without forcing misaligned pipework. Jointing tape on the flat sealing face is not a substitute for the correct washer; it can stop the faces from seating properly.
Leak around the valve spindle or slot
If water appears from the valve stem, handle, or screwdriver slot, the internal stem seal or gland is the likely issue. Some valves have a small gland nut that can be tightened slightly to compress packing. Many compact pump isolation valves, however, are not designed for meaningful servicing. If the leak continues after gentle adjustment, valve replacement is the dependable option.
A spindle leak also suggests that the valve may not isolate reliably. If the valve leaks when it is turned, it may also pass water internally when closed. That matters because an apparently simple pump gasket replacement can become a full system drain if the valve cannot hold back the circuit. See also: Storage Systems.
Leak at the pipe compression connection
A compression leak may appear where the valve connects to copper pipe. If the nut is only slightly loose, a cautious small tightening movement may stop the weep. If it does not, the olive may be damaged, the pipe may be scratched, or the valve may be misaligned. Replacing the olive or valve section may be necessary.
Compression joints should not be used to pull pipes into alignment. A central heating pump should sit naturally between the two valves or flanges. If the pipework springs apart or twists when a union is loosened, the alignment problem should be corrected rather than hidden with more torque.
Leak from the valve body
A leak from a casting, pressed seam, or corroded valve body is not a gasket issue. The valve has failed and should be replaced. External sealants, epoxy, or temporary wraps may reduce visible dripping for a short time, but they do not restore the pressure and temperature integrity of the valve. In a heating plant room, this type of patch should only be considered emergency containment while proper repair is arranged.
When replacement is better than tightening
Tightening is quick, but it is not always the right repair. Replacement is usually the better option when the valve is old, seized, corroded, leaking from the spindle, or unable to close fully. It is also sensible to replace both pump isolation valves when a new pump is being installed and the existing valves show staining or poor movement.
In hydronic systems, a sound isolation valve does more than prevent leaks. It reduces downtime during future pump replacement, makes air removal and maintenance easier, and limits the amount of water that has to be drained. For commercial or industrial plant rooms, this serviceability benefit is often more important than the small material cost difference between basic valves and higher-quality service valves or isolation flanges.
When selecting replacement valves, check the connection size, pump flange or union standard, temperature rating, pressure rating, material compatibility, and available space for turning the handle. Full-bore ball-type isolation valves or purpose-made circulator isolation flanges are often preferred because they give a clear open-or-closed position and lower flow restriction than many older restrictive valves. The final selection should match the system design and local code requirements.
Prevention for future pump and valve service
Good installation practice prevents many future leaks. Use the gasket supplied or specified for the pump or valve set, keep sealing faces clean, and tighten connections evenly. Do not allow the pump casing to carry the load of unsupported pipework. Leave enough access around the pump for a wrench, tray, inspection, and future replacement.
- Install isolation valves on both sides of the circulator so the pump can be serviced without draining the entire circuit.
- Replace old pump washers whenever a union is opened.
- Avoid mixing flange patterns, gasket types, or improvised washers that do not match the pump face.
- Inspect for mineral deposits or rust during annual heating maintenance.
- After refilling, vent air from the system and check the pump area again when the system reaches operating temperature.
- Maintain water quality according to the boiler and inhibitor supplier’s instructions, because corrosion debris can shorten the life of valves, pumps, and seals.
A final hot check is important. Some joints appear dry when cold but weep as the system heats and metal expands. After any repair, check the pump and valve area cold, during warm-up, and again after a full heating cycle.
Frequently asked questions
Can I keep using the heating if a pump isolation valve is leaking?
A slight stain or occasional drip may not stop the system immediately, but it should not be ignored. A small leak can damage electrical components, corrode bolts, reduce system pressure, and worsen when the water heats. If water is reaching wiring or the leak is active, switch the system off and arrange repair.
Will tightening the valve stop the leak?
Sometimes, but only when the leak is from a slightly loose compression nut, union, or gland that is otherwise in good condition. Tightening will not fix a split gasket, cracked valve body, badly corroded flange, or worn internal stem seal. Excessive tightening can create a larger failure.
Do I need to drain the whole central heating system?
Not always. If both pump isolation valves close properly, only the pump body and the short section between the valves should need draining. If either valve passes water or must be replaced, a wider drain-down or controlled pipe freezing method may be required.
Should both pump isolation valves be replaced together?
If one valve has failed from age, corrosion, or seized operation, the other valve may be in a similar condition. Replacing both during pump work can reduce the chance of another leak and makes future maintenance easier. The decision depends on access, system condition, and whether the existing valves can still isolate reliably.
Is a leaking isolation valve the same as a leaking pump?
No. A pump leak can come from the pump casing, motor seal area, flange gasket, or union connection. An isolation valve leak comes from the valve body, stem, compression joint, or valve-to-pump connection. Accurate diagnosis matters because replacing the pump will not fix a failed valve body or pipe joint.